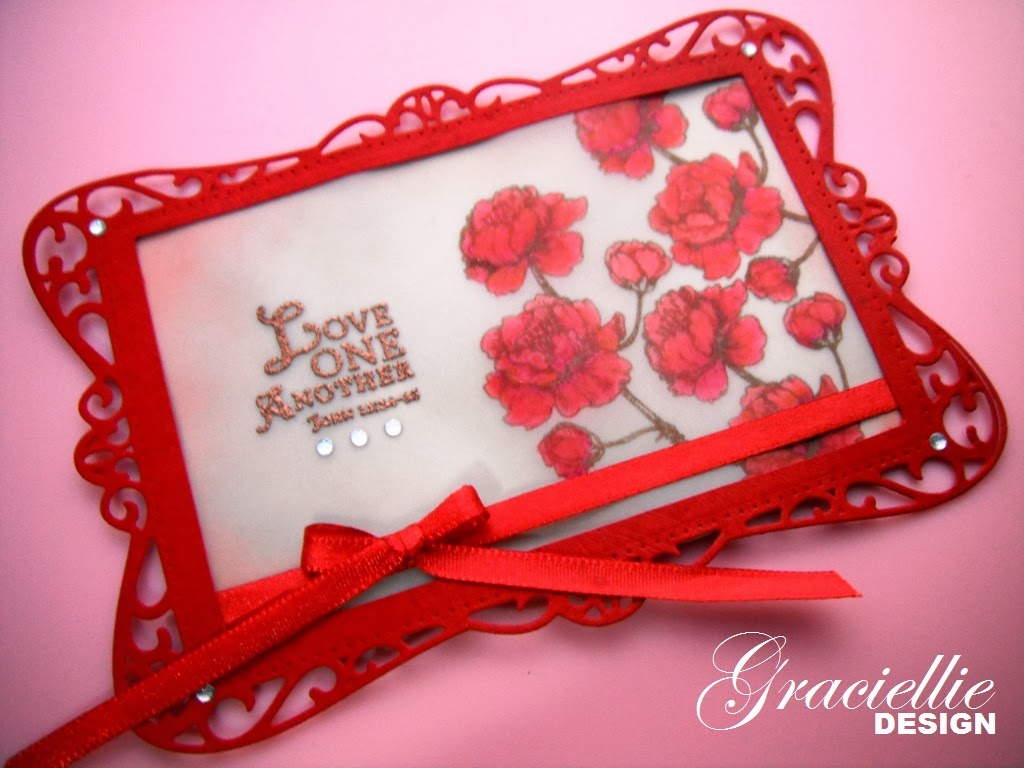
Hello! Once again I'm here posting a new little project. I feel inspired this week! This time I have a frame that was created to fit this week's Flourishes and Our Daily Bread challenges.
I wanted to stamp and color on vellum (with Spectrum Noir markers), and the result was an image with watercolor effect. This is great! So I layered it over a beige paper and framed it with Spellbinders Timeless Rectangles.
 The images and sentiment are from Flourishes Cherry Blossom stamp set. This time I colored them in red, because this stamp in particular looks more like a rose, I thought it could work...
 Recipe:
Love sentiment
Ornate Frame
Verse, Vellum
Embossed sentiment
Our Daily Bread Blog
Flourishes

How stunning Graciellie! Love the bold red w/the embossed gold verse! Your coloring on vellum does look like watercolor! Quite beautiful! Thanks for creating with us this week at ODBD!
ReplyDeleteTY Linda, I really appreciate it!
ReplyDeleteOMGosh, this is beautiful! I love the soft look of the vellum and the embossed sentiment looks fantastic. Thanks so much for playing along in this week's Timeless Tuesday Challenge!
ReplyDeleteWhat a stunning card!! I love the vellum, the beautifully colored flowers and the embossed sentiment!! It is framed to perfection!! Thanks for joining the ODBD Shining the Light challenge this week!!
ReplyDeleteCheryl thanks so much for having me. I appreciate your visit, and your compliments.
ReplyDeleteChris, I'm glad you liked it. Thanks so much for stopping by...
ReplyDeleteAbsolutely gorgeous. Thank you for joining in with our Touch of Red challenge at Cuttlebug Mania x
ReplyDeleteAbsolutely stunning!!!! I love the vellum and gorgeous flowers, ribbon, and die cut frame! Thanks so much for playing along in the ODBD challenge this week! God bless!
ReplyDeleteThanks Kerry, it's my first at Cuttlebug Mania. Thanks for having me and for stopping by!
ReplyDeleteAngella thank you so much for your visit! I'm glad you liked it! Blessings to you to!
ReplyDeleteOh, Graciellie, your card is absolutely stunning! I LOVE the rich, red die and the ribbon that really highlight your beautiful flowers! And I especially love the Scripture verse! Your LOVE recipe is perfect! I'm so glad you've joined us again this week for the ODBD Shining the Light challenge! Hugs, precious friend!
ReplyDeleteOh dear, TY you're so very kind. I really appreciate it!
ReplyDeleteI just love the soft effect of your stamping on vellum. . Thanks for playing along at Cuttlebug Mania this time x
ReplyDeleteOMGosh this is stunning, love the fabulous coloring and the beautiful design. Thanks for playing with us over at Loves Rubberstamps!!!
ReplyDeleteThanks Kimbo! I'm glad you liked it!
ReplyDeleteHolly, I really appreciate your kind words! Thanks for having me!
ReplyDeleteNICELY DONE!!!!!!!!!:)
ReplyDeleteWhat a stunning design! Love the pretty red flowers and die cut. We sure are happy to have you join us this week at Loves Rubber Stamps. Good Luck and Tons of Hugs, Dangina
ReplyDeleteWOW this is stunning too. Sadly because your cards were posted before the challenge on MAWTT began (Feb 6th) we cant enter them into the Top 3 Draw. Thanks for sharing them though, Hazel x
ReplyDeleteOh my Graciellie! This is a stunner of a card. Your colouring is beautiful! Thanks for joining us for our Timeless Tuesday Challenge this week at Flourishes!
ReplyDelete